Chapter-7: Create Your Second Website using React.js
Introduction
In this lab, we will create our second website using React.js, which serves as another MicroFrontend application in our Microservices architecture.
Our goal is to prepare a React.js application for deployment on Kubernetes. The UI applications developed in this lab will be utilized in subsequent labs, including the creation of DevOps pipelines and the deployment to Azure Kubernetes Service.
Let's look into the lab and begin our journey by creating a React.js application as part of the Microservices Architecture!
Technical Scenario
As a Frontend (FE) developer, you have been assigned the task of developing a website or UI application using React.js technology. This website will be one of the small Website (UI) components in our MicroFrontend applications list.
This lab aims to provide you with hands-on experience in creating a React.js application as part of the Microservices Architecture. We will begin by utilizing an existing Git repository and proceed to create a new React.js project within it. Finally, we will containerize this website and push it to the Azure Container Registry (ACR) in preparation for deployment to Azure Kubernetes Service (AKS).
Objective
In this exercise, our objective is to accomplish and learn the following tasks:
- Step-1: Install Node.js and NPM
- Step-2: Create new React.js application
- Step-3: Add Dockerfiles to the React.js project
- Step-4: Docker Build locally
- Step-5: Docker Run locally
- Step-6: Publish docker container to ACR
Prerequisites
- Git Repository
- Clone existing Microservices repo
- Download and install software for React Development
- Docker Desktop
- VS Code with Docker extension
- Azure Container Registry (ACR)
Architecture Diagram
The following diagram shows the high level steps to create the website using React.js.
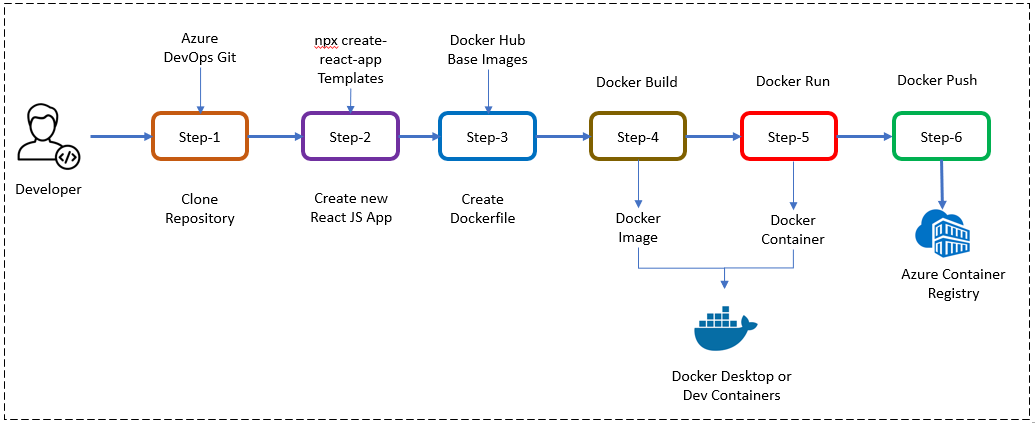
Step-1: Install Node.js and NPM
Note
Screenshots and sample output in this chapter were captured with an earlier setup and may differ slightly from what you see with current tool versions.
Before you can create a React app, you'll need to install Node.js and NPM (Node Package Manager) on your system. You can download the LTS installer of Node.js and NPM from the official website: https://nodejs.org/en/download/
Manual install
Click on the Installer as per your Operating system preference to install Node.js & NPM both in your system.
install using commands
- Windows OS
Install Node.js & NPM using Chocolatey (choco) for Windows users, assuming you already installed choco in your system, run these commands as administrator from command prompt
# This command will download and install the current LTS version of Node.js.
choco install nodejs-lts
- Mac OS
Install Node.js & NPM using Homebrew for Mac users, assuming you already installed Homebrew in your system:
verify that Node.js is installed correctly
output verify that npm version is installed correctly output{
npm: '9.5.1',
node: '19.8.1',
acorn: '8.8.2',
ada: '1.0.4',
ares: '1.19.0',
brotli: '1.0.9',
cldr: '42.0',
icu: '72.1',
llhttp: '8.1.0',
modules: '111',
napi: '8',
nghttp2: '1.52.0',
nghttp3: '0.7.0',
ngtcp2: '0.8.1',
openssl: '3.0.8+quic',
simdutf: '3.2.2',
tz: '2022g',
undici: '5.21.0',
unicode: '15.0',
uv: '1.44.2',
uvwasi: '0.0.16',
v8: '10.8.168.25-node.12',
zlib: '1.2.13'
}
Step-2: Create a new React.js application
Once you have Node.js installed, you can create a new React.js application using Vite. The older create-react-app tool is deprecated, so we use the Vite React template instead. Open a terminal window and run the following command:
This command will create a new React.js application with all the necessary files and directories in a folder named react-app in your current directory. If Vite asks any questions, accept the defaults.
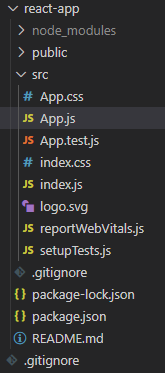
Run the Application
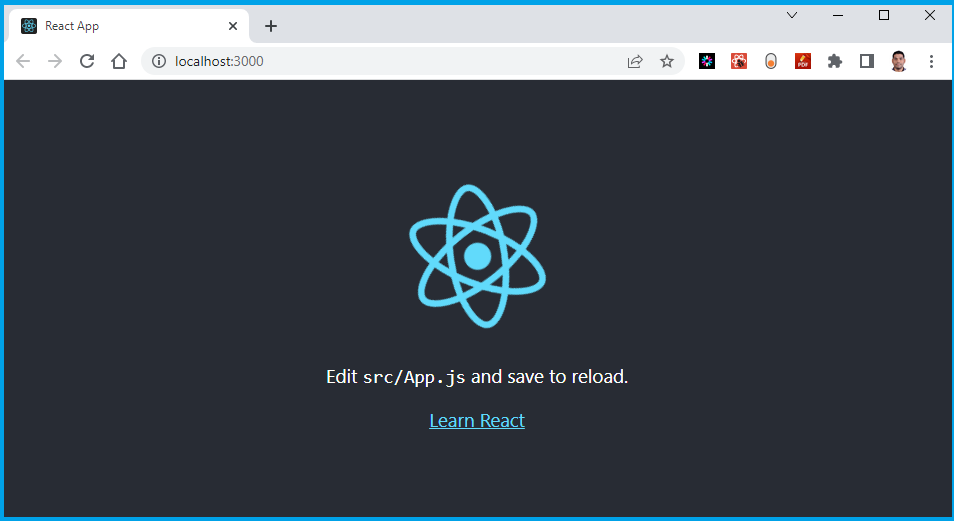
The Vite dev server starts on http://localhost:5173. Open it in your browser to see the running application.
Step-3: Add Dockerfiles to the React.js project
Create a Dockerfile in the root directory of your project and copy following code. Dockerfile will provide instructions for building a container image of our React.js Website.
# Build stage: compile the static site with Vite
FROM node:24-alpine AS build
WORKDIR /app
COPY package.json package-lock.json ./
RUN npm ci
COPY . .
RUN npm run build

# Serve stage: static files served by nginx
FROM nginx:alpine AS final
COPY --from=build /app/dist /usr/share/nginx/html
EXPOSE 80
Create a .dockerignore file next to the Dockerfile so local node_modules and dist folders are not copied into the build context:
This is a multi-stage Dockerfile. The first stage uses Node.js to install dependencies (npm ci) and build the static files (npm run build) into /app/dist. The second stage copies only those static files into an nginx:alpine image, which serves them on port 80. The final image contains no Node.js or source code, so it is small, and no development server runs in the container.
Note
Read inline comments of the Dockerfile for understanding the Dockerfile instructions
Step-4: Docker Build locally
We will build the Docker container locally using the Dockerfiles and ensure that the containerized application functions as expected.
The docker build command is used to build Docker images from a Dockerfile.
Docker runs both stages (installing dependencies and building the site, then copying the result into the nginx image) and finishes by naming the image sample/react-app:20230322.1.
When you run the docker build command, Docker looks for a Dockerfile in the specified directory (PATH) and reads the instructions in the file to build a new image.
The Dockerfile contains a series of instructions that define how to build the image, such as copying files, running commands, and setting environment variables.
Step-5: Docker Run locally
Run the Docker container locally to verify that the application functions correctly within a containerized environment. This step ensures that the containerized application operates as expected on your local machine.
Run the docker run command to start a container based on the image:
if you open Docker Desktop you will notice the new image & container started running.
Image
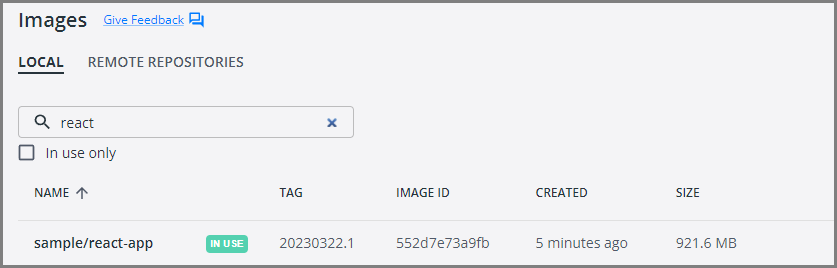
Container
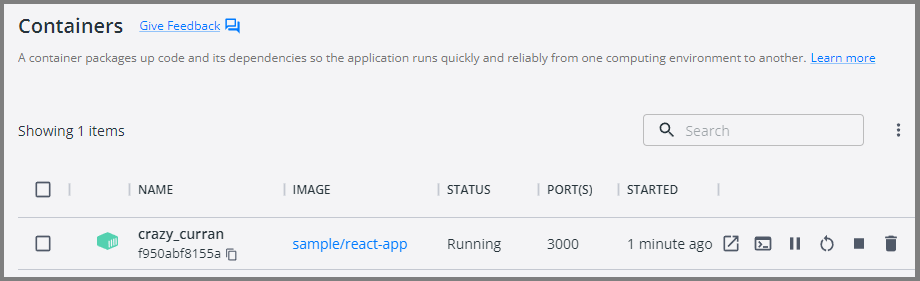
This will start the React.js application in the Docker container and map the container's port 80 (nginx) to your local machine's port 8080.
Your React.js application is now running inside a Docker container.
Open your favorite browser and enter the following URL to see the running application in port 8080
You now have a basic React.js application up and running. From here, you can continue building out your application by adding more and more code as per your requirements.
Step-6: Push docker container to ACR
Now we've Docker Containers ready locally for push to Container Registry so that we can use them in future deployment to Azure Kubernetes Service (AKS). This step prepares the container for deployment to the cloud environment.
To publish a Docker container to Azure Container Registry (ACR), you will need to have the following:
- Create an Azure Container Registry. If you don't have one, you can create one by following the instructions in the Azure Portal or using Azure CLI.
-
Log in to your Azure Container Registry using the Docker command-line interface. You can do this by running the following command:
list all the Docker images that are available on the local system# azure Login az login # set the azure subscription az account set -s "anji.keesari" # Log in to the container registry az acr login --name acr1dev # Login Succeeded # To get the login server address for verification az acr list --resource-group rg-acr-dev --query "[].{acrLoginServer:loginServer}" --output table # output should look similar to this. # AcrLoginServer # ------------------ # acr1dev.azurecr.iooutput
-
Tagyour Docker container image with the full name of your Azure Container Registry, including the repository name and the version tag. You can do this by running the following command: -
Push your Docker container image to your Azure Container Registry using the Docker command-line interface. You can do this by running the following command:
Output
The push refers to repository [acr1dev.azurecr.io/sample/react-app] 649a035a1734: Pushed 4061bd2dd536: Pushed c0257b3030b0: Pushed 912a3b0fc587: Pushed a36186d93e25: Pushed a3d997b065bc: Pushed 65d358b7de11: Pushed f97384e8ccbc: Pushed d56e5e720148: Pushed beee9f30bc1f: Pushed 20230322.1: digest: sha256:73f0669d18c6cae79beb81edc8c523191710f9ec4781d590884b46326f9ad6f9 size: 2419 -
Wait for the push to complete. Depending on the size of your Docker container image and the speed of your internet connection, this may take a few minutes.
-
Verify the newly pushed image to ACR.
Output
-
Show the new tags of an image in the ACR
output
You've successfully pushed your Docker container image to Azure Container Registry. You can now use the Azure Portal or Azure CLI to manage your container images and deploy them to Azure services like Azure Kubernetes Service (AKS).